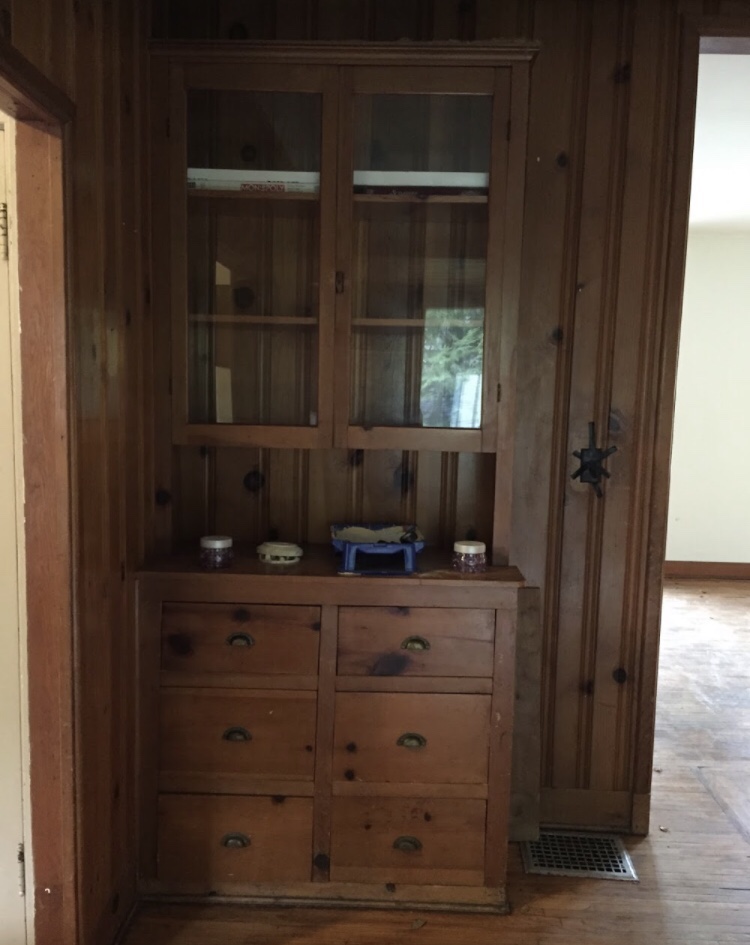
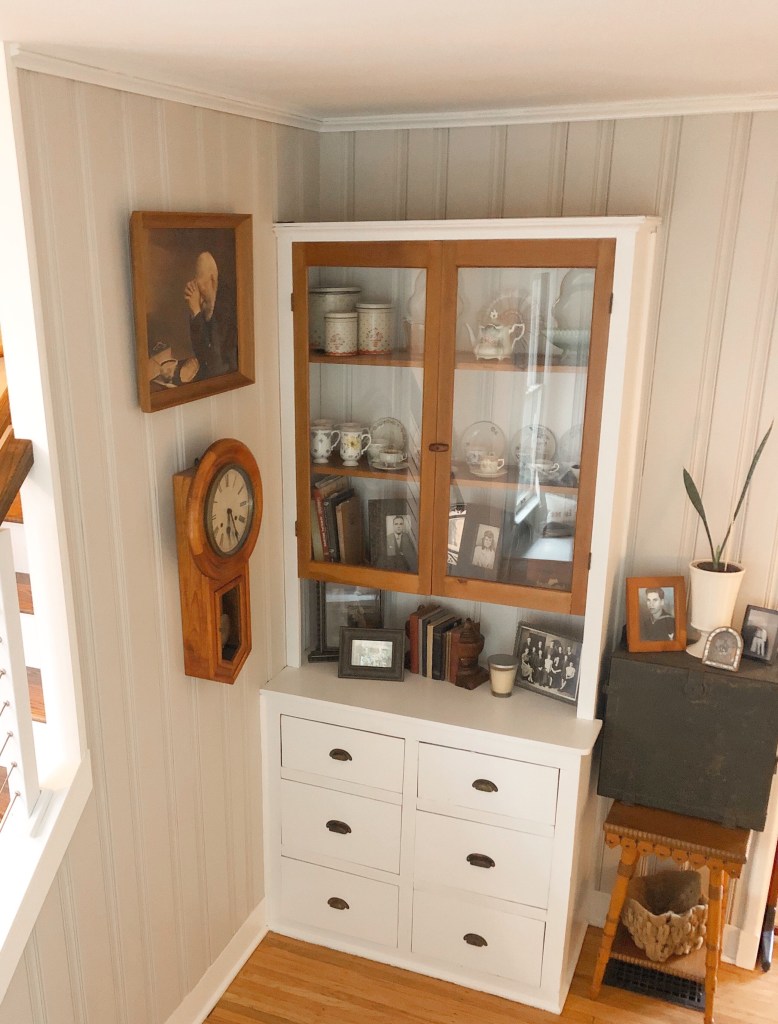
Our house was built in 1922, but the original owners must have remodeled the dining room in the 1950’s. It looks like a bump-out addition was added, along with wood paneling and a built-in china cabinet.

Our architect wanted to eliminate the built-in and have the stairs run straight down from the attic, but ya’ll know I couldn’t let that happen. (I’ll tell you the full stair saga another time.)
One of the first things we needed to do was refinish all of the original wood flooring in the house. It was in pretty rough shape, and there were electrical outlets in the floor (which seemed like a bad idea to me). We had an electrician move them up into the wall, and the floor guys patched the floors. We used Cavalier Flooring and thought Tony took good care of us. If you’re local to Columbus, check them out!

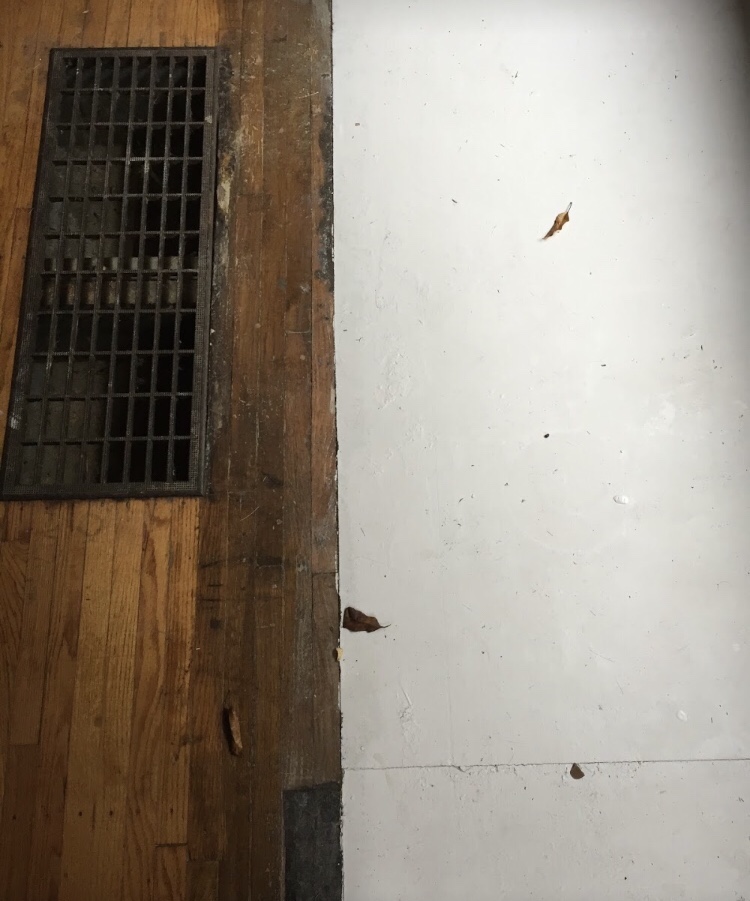
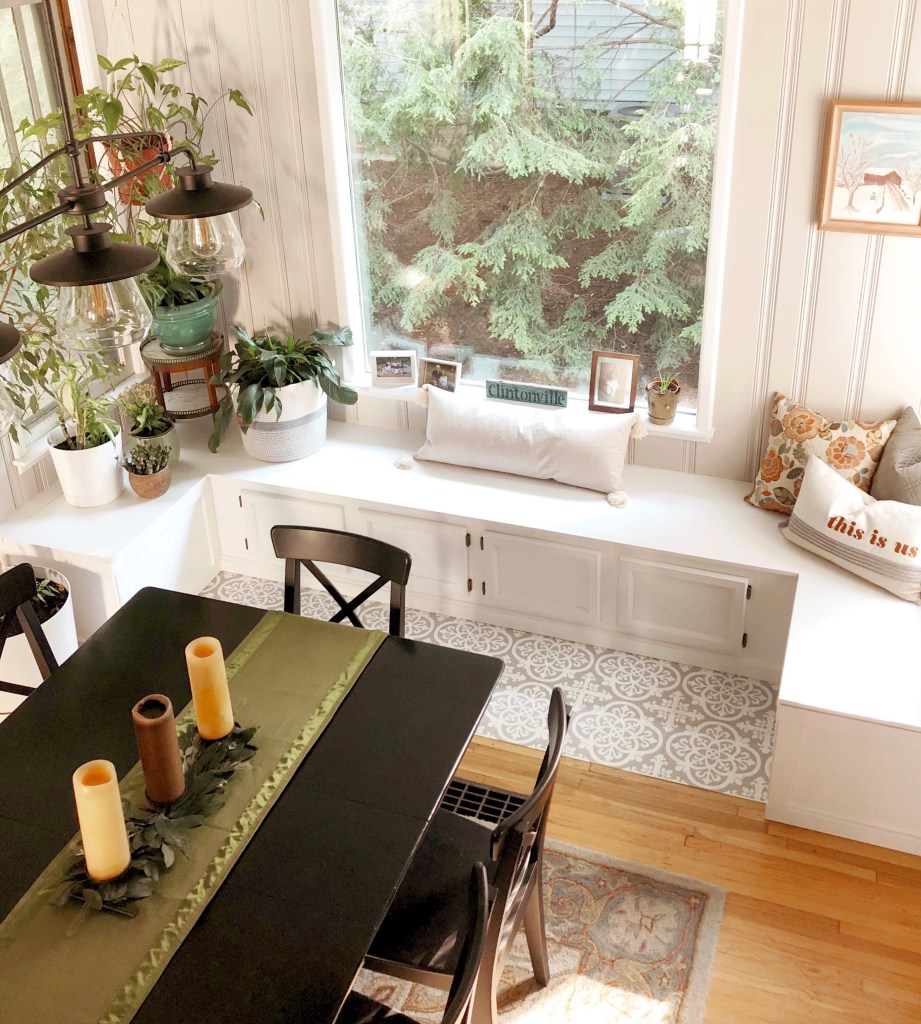
The bump-out addition didn’t have wood floors, just a plywood subfloor that had been painted. I’m assuming when they did that addition they had carpeting on all of the floors so that it didn’t matter. We considered having the floor guys lay new oak there, but it would have been pretty expensive. Besides, I had some fun ideas for that area which I’ll share in a second.
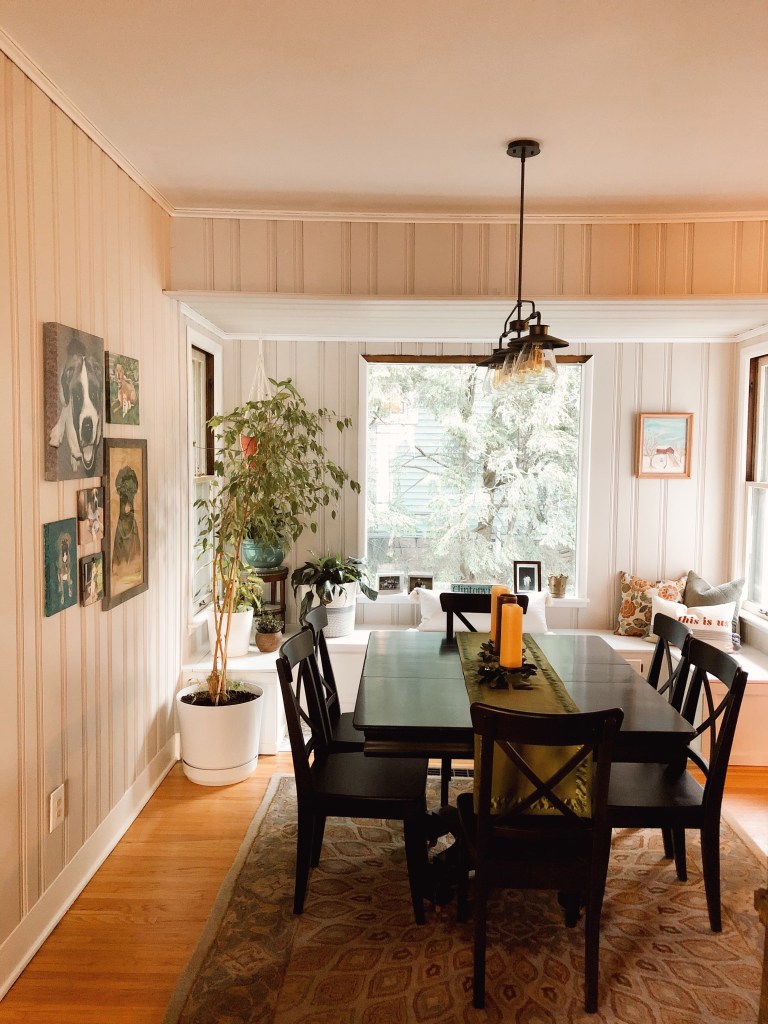
The next thing that needed to happen was lightening up the room. Even with that huge window the wood paneling kept the room looking dark. I didn’t want to rip out all the paneling (lord only knows what can of worms that would have opened), and so it was paint to the rescue. We used Sherwin Williams Gracious Greige. In order to prep the walls I needed to patch the many, many holes and sand the walls. Then prime all those spots and the pine knots with an extra coat of hiding primer. It was a dusty mess, and I was thankful this all happened before we moved in.


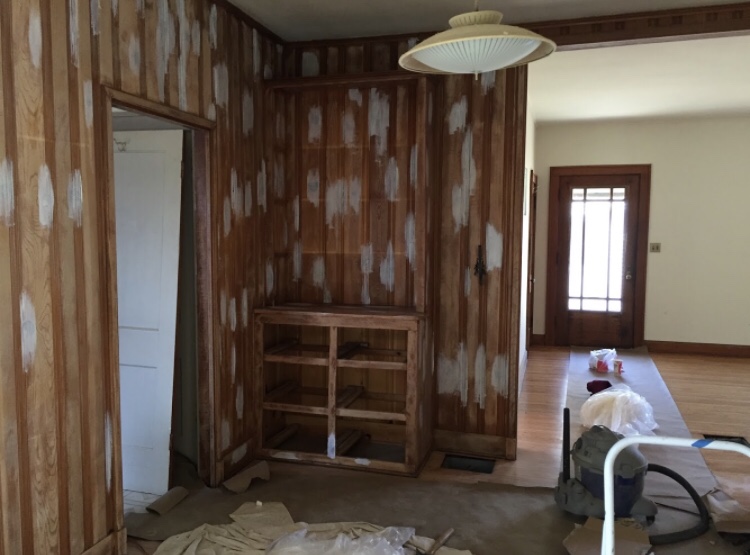
I knew I also wanted to paint the built-in. I’m normally opposed to painting wood, and if this had been original to the house I definitely would not have. But this pine wasn’t in great shape, wasn’t pretty and I broke my own rule. I used the same paint that I used on the trim in the entire house (Benjamin Moore Advance in satin and color-matched to our kitchen cabinets). I think it was a smart choice!
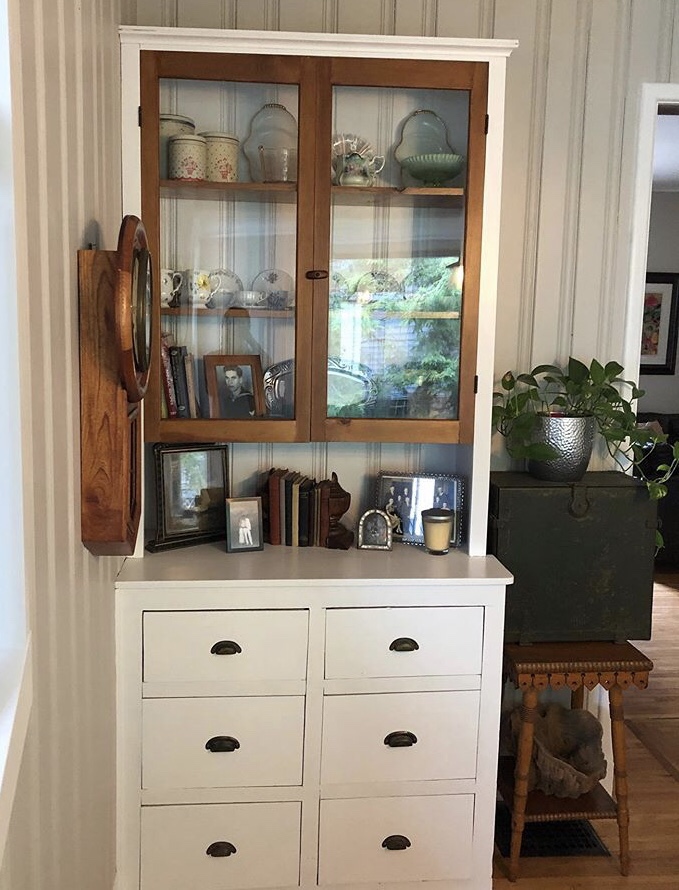
I struggled with what to do with the shelves and doors, but I decided to simply sand and stain them a natural color for some contrast with the painted cabinet.

Now to tackle that weird bump-out. The floor was a big problem because the plywood subfloor was the same height as the wood flooring. This meant that actually trying to tile the space would have caused quite a large step-up transition which I didn’t want. I threw around the idea of doing a painted rug in that area, but I also wanted a real rug under the dining table and thought it would be too much. And who am I kidding…I’m no artist. Then I saw these FloorPops peel and stick tiles online through Walmart for super cheap. There were lots of options, but I went with a simple, graphic pattern in white and grey. There’s very little thickness to these which was perfect for this spot.

I didn’t have to do the entire space because I knew I was going to be building a U-shaped banquette in this area. The bump-out is nice, but it was a little awkward and not true usable space.


I’m going to do a full “how-to” blog post of how I built the banquette, but I think it really allows for more function. Not only does it add a decorative element (and a place to display plants — my newest obsession), it’s a nice reading nook, it houses the five leaves that go into our antique dining table, and if we were hosting a large party we could extend the table and use the bench as seating. Practical AND pretty. And it’s the first thing I’ve ever built all by myself from scratch. (I’m so proud.)


I added a wool rug that I got through the Fast Track auction site. I kept our antique oak table (painted black by the previous owners) from our last house. We had bought IKEA INGOLF dining chairs to go with it since we didn’t have the originals.

As sad as I was to see that vintage atomic light fixture go, a fixture from Costco fit in a bit better with our style. I searched hard for a fixture that didn’t have any chain — to me that’s a dust/spider web catcher and a HARD PASS. Love that this one is a metal rod and not a fabric cord. I couldn’t find it for sale at Costco anymore, but this one at Wayfair looks to be identical.

I added a gallery wall of our dogs, past and present. Plus a clip frame for adding pictures of our foster dogs. I tried to get a variety of mediums for the gallery wall — chalk drawing, painting on canvas, canvas photo etc. There’s still plenty of room to add to the wall over the years! (Be right back — crying thinking about losing any of our dogs).

My in-laws gave us this beautiful antique clock, and you can’t have a dining room in the midwest without this painting (if you know you know).

I added one more piece of art. This sweet painting by Bertha Weber, who was my neighbor in Funk, NE growing up. She used to let me come over and snoop through her basement, eat her cookies and dust her salt and pepper collection. There were times my parents thought I was missing when I was just over at Ray and Bertha’s!

I’m really happy with how this room turned out. I hope you like it too!


Wow! That was a real upgrade! I am marveling at your know how and mad skills! So beautiful!
LikeLiked by 1 person
Thank you so much!
LikeLike
Genius idea for the floor in the bump out area! Everything looks fantastic!
LikeLiked by 1 person
Thank you, Anita! There were so many problems to solve in this room. I’m glad it all finally came together!
LikeLike