Happy February, friends!
Did you notice that I stopped posting weekly? I mean, really, who was I kidding? That was NOT a sustainable pace for me and I have comfortably settled into a monthly post schedule. So here is your second post of 2021.

Today’s blog is all about THE STAIRS. Every time I do an Instagram post where the stairs are visible I get asked when they will make it onto the blog. TODAY is the day! Maybe I’ve been putting off writing about the process because it was the absolute hardest, most stressful, it-almost-broke-me DIY I’ve ever done. But I’m doing this just for all of you, so… you’re welcome (and to thank me you can go show me some love on IG because those things matter. LOL)
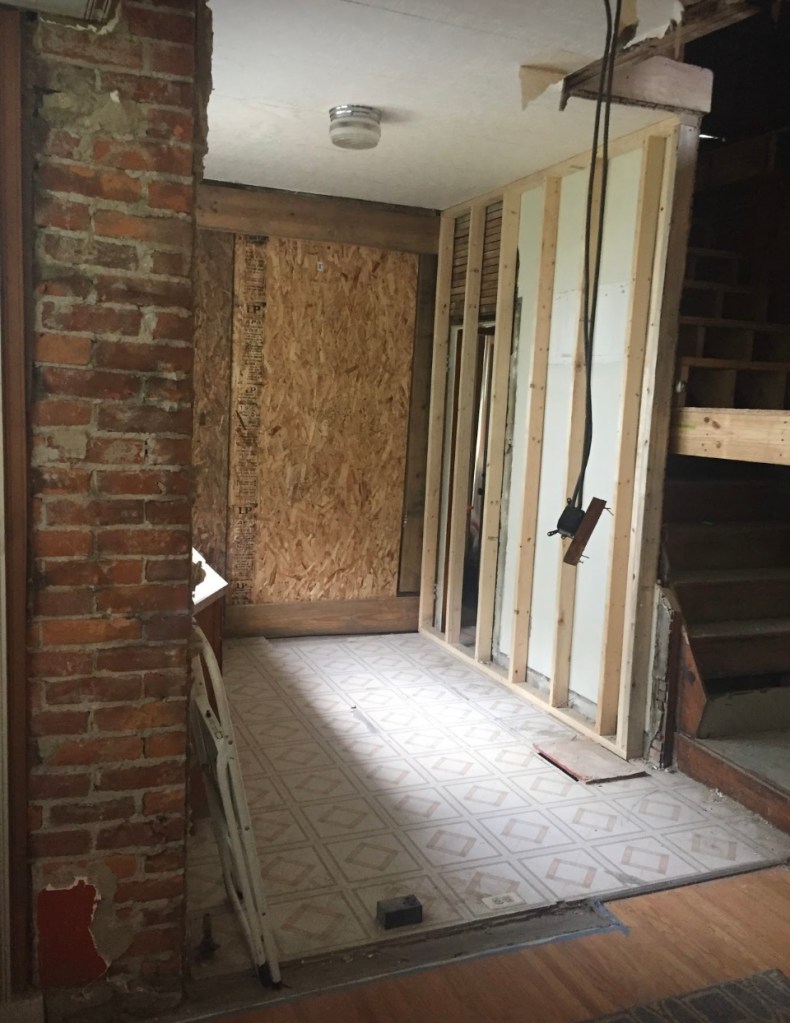
Let’s take a look at what this part of the house used to look like.
The door on the right at the beginning of the video was the attic door. This whole space will become a walk through butlers pantry with the staircase dividing it from the dining room.
When we purchased the home it was a single story with an attic. The stairs to access said attic were hella scary. SUPER steep, very small treads and no handrail (not to mention it led up to a scary, dark cobweb-filled attic. Because we were going to finish half of the attic we needed better stairs that would actually be usable and, ideally, follow at least SOME of the building code. (JK…we followed all of the building code when creating the stairs which is why it was so.dang.hard.)


Originally the door to the attic stairs was off the kitchen. We had two choices when re-configuring them: 1. run them straight down in their current location, but extend them into the dining room (eliminating the dining room built-in hutch) 2. Save the hutch by creating a landing and turning the stairs 90 degrees and having them end in the old kitchen. Guess which option I chose (much to my husband’s dismay)??

You know I couldn’t give up the built-in and lose space in the dining room, so we went with option 2. This did mean that we had to lose a brick chimney because it didn’t give us enough clearance at the base of the stairs. I still wish I could have some exposed brick on the first floor, and was VERY sad to see that chimney go.
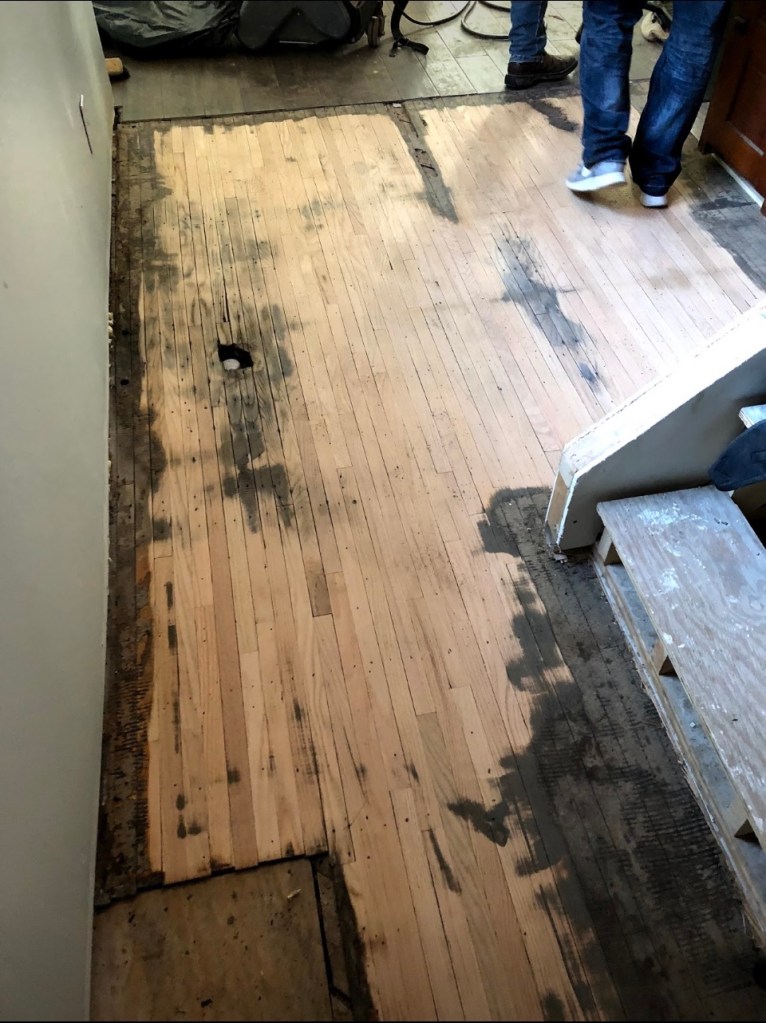
Since this area was the kitchen originally, we weren’t sure what was underneath the linoleum flooring. I prayed for wood and God listened (is that blasphemous?). The concern was that it was not going to be in good enough shape to refinish. Once I removed all of the old linoleum and plywood (quite the job in and of itself) it didn’t look promising.

There were tons of missing areas (one being where the above referenced brick chimney was), lots of holes where plumbing had run, termite damage and water damage from the old sink.

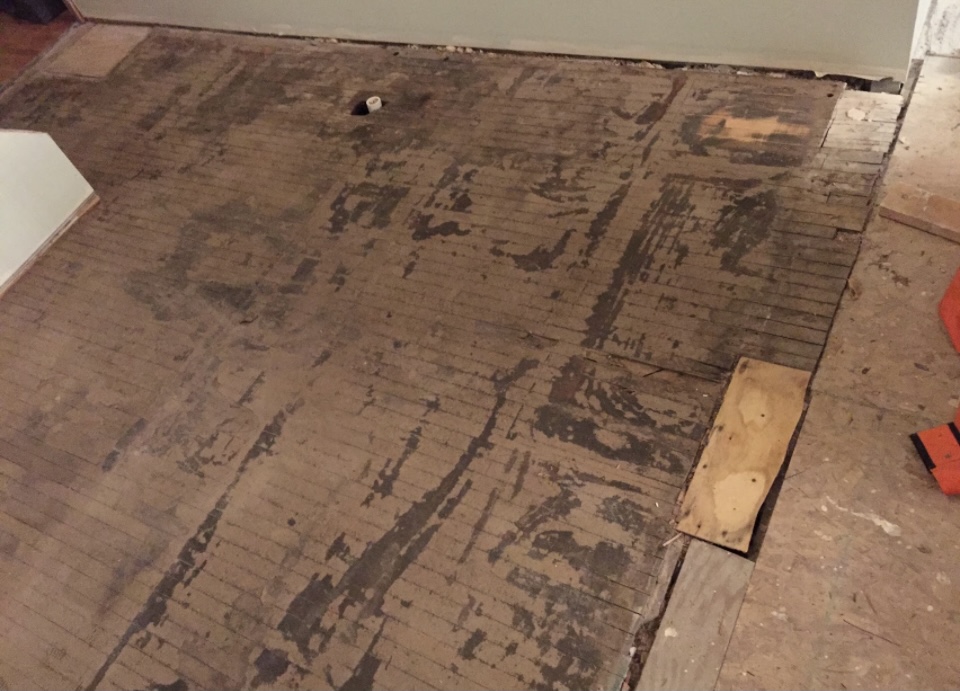
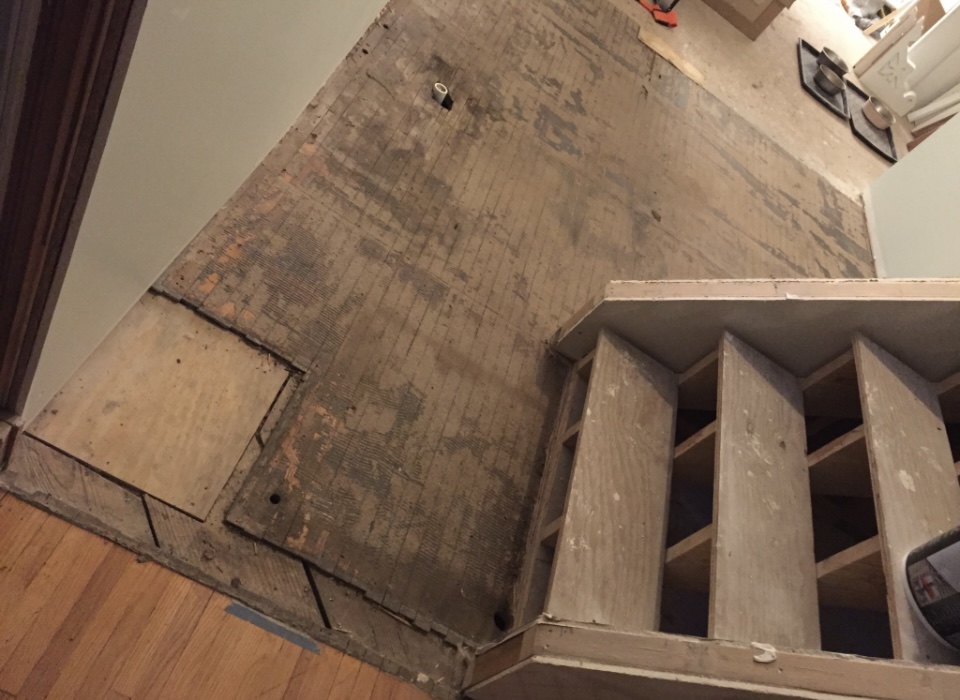

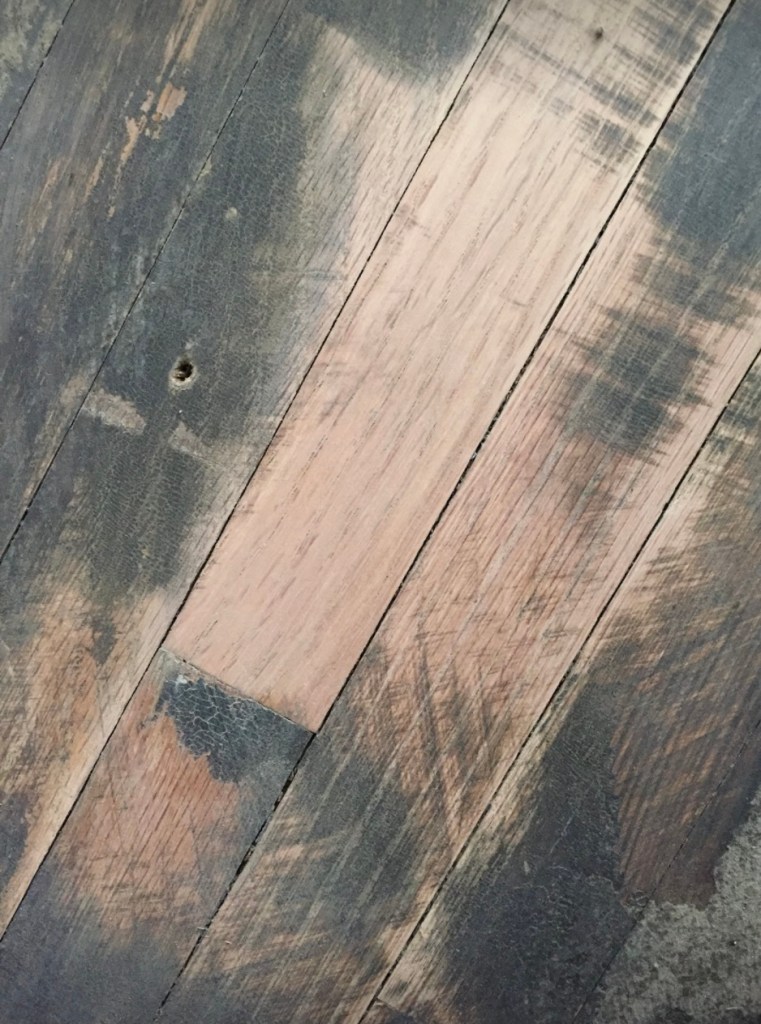
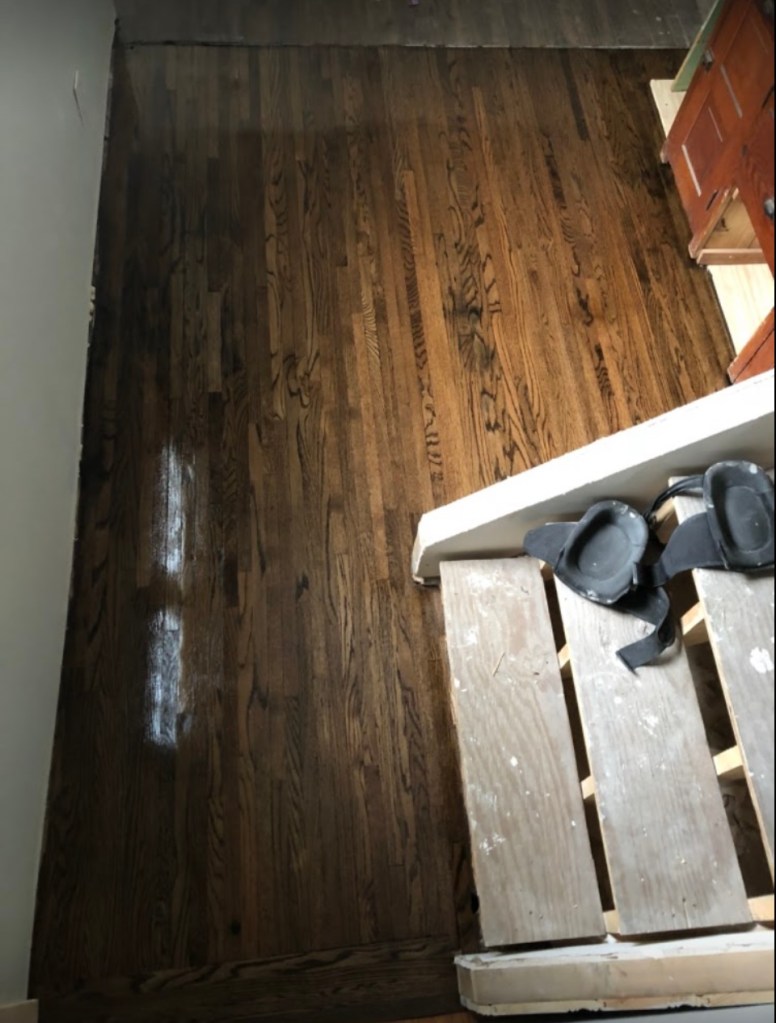
I had Tony from Cavalier Flooring out to take a look (he refinished the other floors in the house for us), and he basically said they were trash and not worth saving. He broke my heart a little bit. Then I had L&L Floors come out and PRAISE BE they said they could do it AND it wasn’t going to cost a ridiculous amount. The only caveat was that we had to stain the floors dark in order to mask some of the dark marks and water damage.

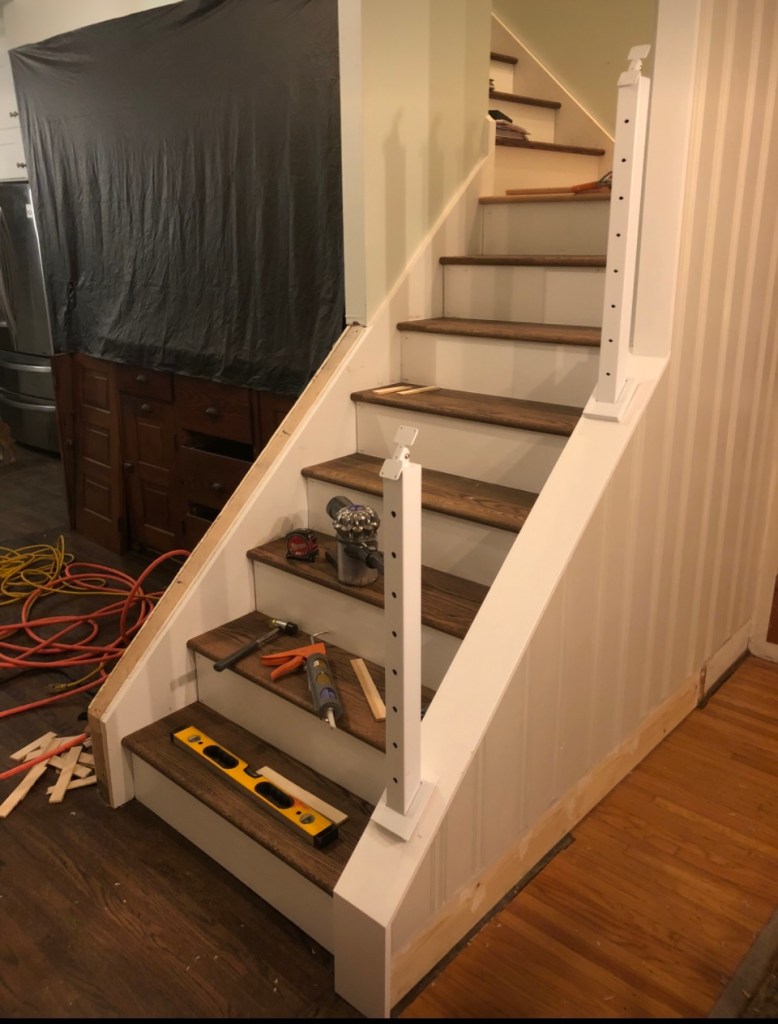
So we had L&L handle the floors in this room, and our contractor created the bones of the stairs. Basically this meant that they put the stringers in and added temporary treads for them to use during construction of the addition. I didn’t realize that they weren’t going to finish the stairs because they deemed it part of “trim work” which I had stupidly agreed to do. Woe is me.

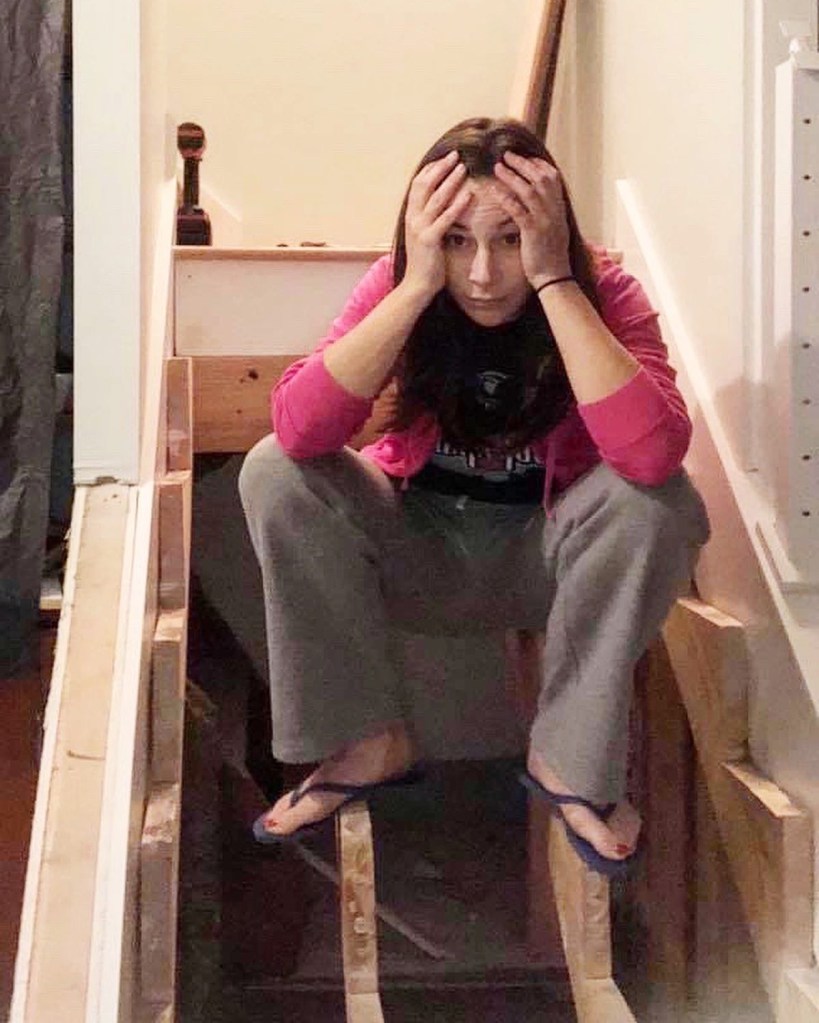
So now I had to learn all there is to know about code for building stairs and put it into practice while trying to make them look attractive. NOT a small feat. At one point I got so desperate that I DID ask the contractor if he would come back and do them and he quoted me over $6,000. DIY it shall be!

I stupidly assumed that the contractor put the stringers in correctly, however, that was a big mistake. I was concerning myself with getting the tread and riser dimensions correct and didn’t realize that the stringers were off by 9/16″. Not completely the contractors fault — apparently it stems back to the fact that they thought we would be adding new floor on top of the old flooring, not using the original wood. That height difference made ALL the difference and really screwed me up. If I told you I basically had to remove the bottom half of the stairs because I got all of the work done before I realized it, would you think less of me??
My buddy, Jon, came to my rescue and helped me remove the stringers and adjust them so all the heights would be correct.


Once the adjustment was made and the stringers were re-installed, I had to re-install all of the treads and risers. Guys, when I tell you it’s hard to get the treads to fit properly I am not kidding you. It SEEMS like it should be simple, but lord almighty it was a cluster. I purchased a stair tread template tool just for this purpose, but it was still a challenge.

None of walls seemed to be perfectly plumb, each step ended up being uniquely NOT square and had to be custom cut and I got so frustrated I ended up just moving forward with treads that aren’t perfect. *gasp* I can’t believe I just admitted that. If you ever come to my house just don’t look too closely (and again…caulk is my friend).

I ended up staining the oak treads with Minwax Jacobean stain to match what we had to use on the floor in this area. I also used the same stain on the handrails. I painted all of the pine risers with the Benjamin Moore trim paint I’m using in the whole house.


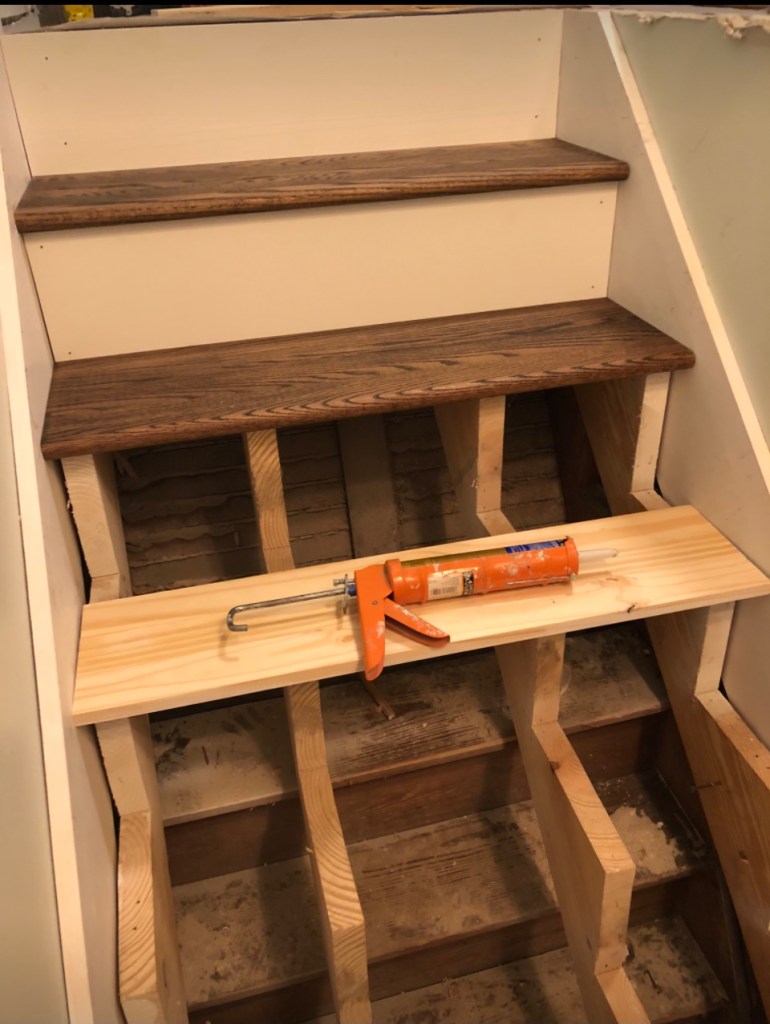

Now for our next challenge. I put baseboard trim on the cap (curb wall), and trimmed out the sides with smaller trim leftover from the kitchen island project. The hardest part was the angle where the stairs run down and then terminate. I did not own an angle finder, so I ended up using a technique I found on youtube using a piece of paper. It worked!


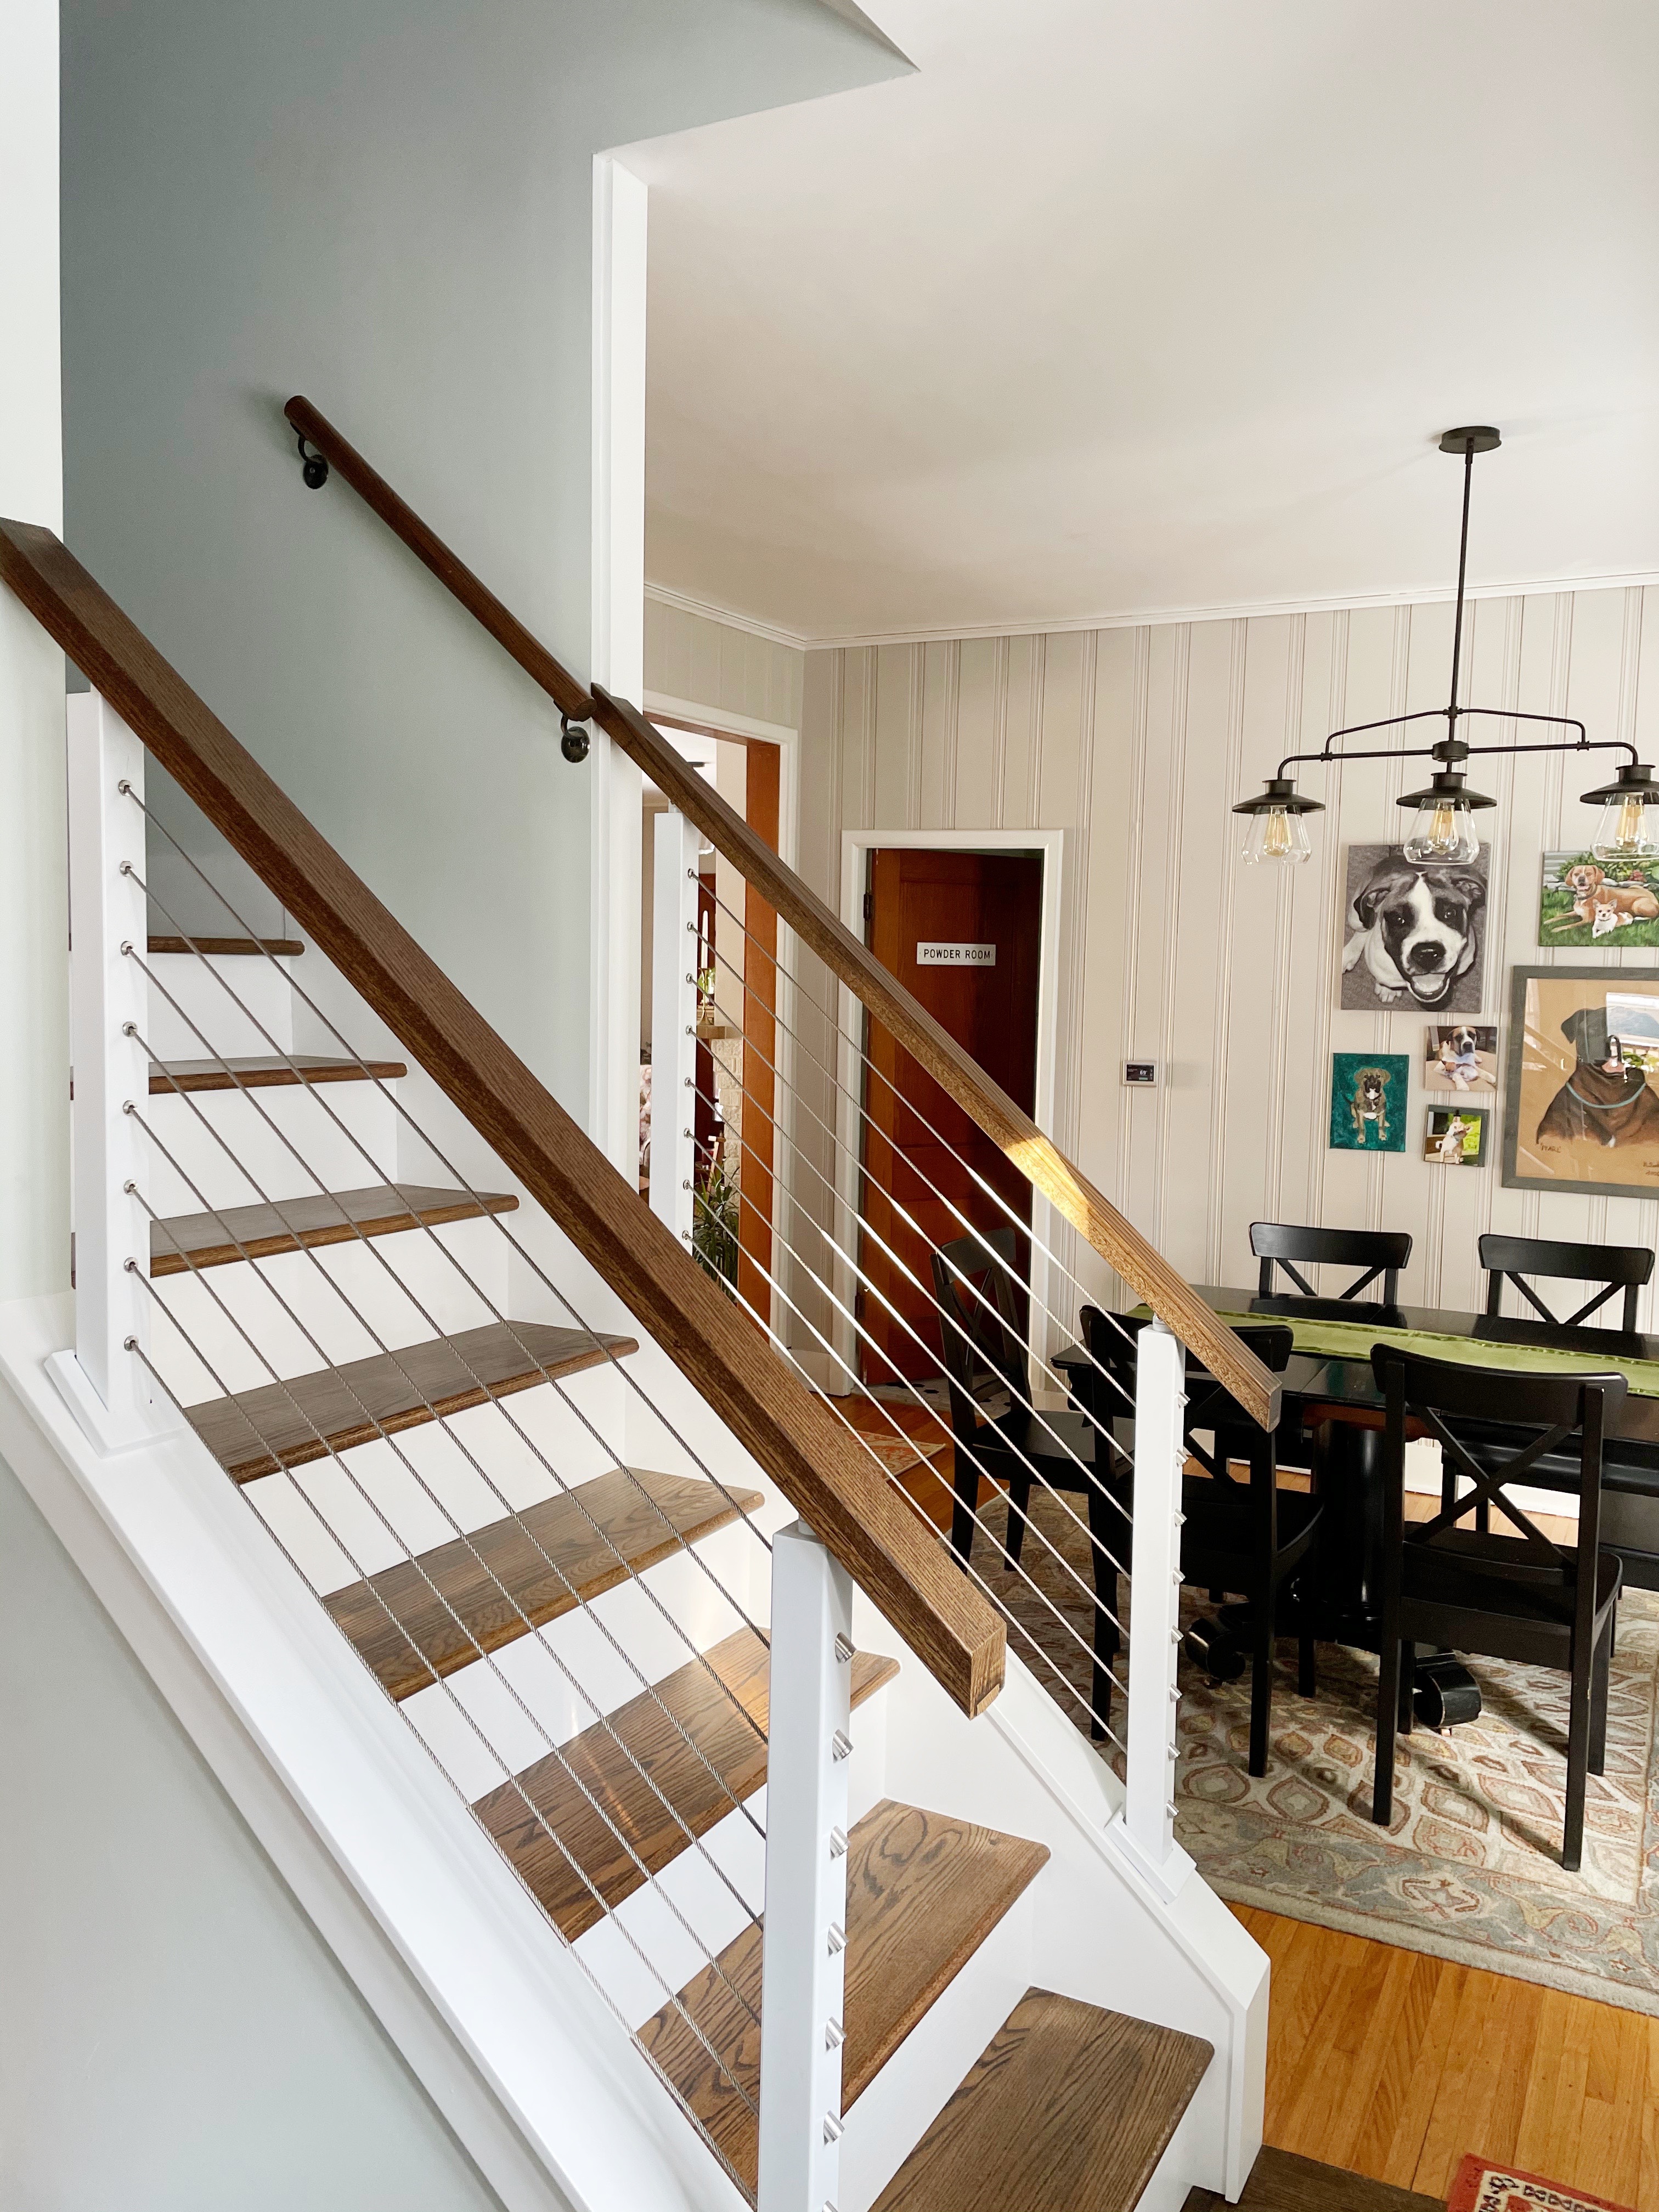
The next task was designing the railing system and handrails. Our house was built in 1922 so in my mind we needed to source antique newel posts and create a wooden railing that would fit the age of the home. That DIDN’T happen. This staircase essentially bridges the gap between the old and the new part of the house. The way that it’s built is not how an antique staircase would be done, and there wasn’t enough clearance at the base to add newel posts. So we started looking at alternatives and found the viewrail cable railing system. This really appealed to me because the cable becomes almost invisible, and increases the sight lines from the dining room all the way to the back of the addition. While I love wood and period appropriate pieces, this felt like the best choice for our situation.

The company took our dimensions and sent us everything we needed except the handrails. I knew I didn’t want it to be all metal, and chose to order wood handrails from our local lumber yard and finish them myself.


So what do you think? Are you ready to tackle stairs on your own, or does this make you realize that it’s not for the average DIYer? I can’t tell you…I will NEVER do it again.
See you in March!
Tisha
